10 Ways to Save Money in New York City

10 ways to save money in NYC

Vacations are expensive…unless you’re one of those trip planning wizards who can get 17 credit cards that magically provide you with First Class tickets across the world and free hotel stays for 2 months. If you’re one of those people, then get outta here. If you’re not, vacations are expensive. That fact is pretty inevitable. However, there are some things you can do to help bring the cost down. We lived on the East coast last summer and made countless trips into New York City. Here are some tips I picked up to keep our excursions to the Big Apple from breaking the bank!

9-11 Memorial

1. Use an app like TodayTix to get last minute tickets to Broadway shows.

We discovered TodayTix early on in our trip, and I’m so glad we did! It allows you to purchase heavily discounted tickets for Broadway (and Off-Broadway) shows up to one week prior to the show date. You can choose the showtime and price bracket you’re comfortable paying. Once you pay, you will be greeted by a TodayTix team member the day of the show outside the theater with your tickets! It sounds sketchy, I know. However, we used TodayTix multiple times and never had an issue! If there’s an in-demand show that you don’t want to miss out on, definitely buy your tickets ahead of time. However, if you have some room in your schedule, definitely consider using TodayTix! You can also enter their lotteries for various shows to get even heavier discounted tickets. You can use my referral code to save $10, too! Simply enter ITHIP during checkout.

Broadway Playbill

2. Stay outside of NYC and take the train in.

We were living in Princeton, so we took the NJ Transit into town every time. If you’re going for a short trip, it may be more cost/time effective to simply stay in the city. However, if there are other parts of the East Coast you want to explore on your trip or you aren’t short on time, consider staying outside of NYC. Chances are, the hotel will be less expensive. We’ve gone on trips to Maryland where we drove to Secaucus, NJ and took the train to Penn Station from there for only about $10. It’s definitely something to consider to keep costs down!

Rockefeller

3. Make your “souvenirs” experiences. 

How many times are you really going to wear that I<3NY shirt or admire that NYC skyline snow globe? Chances are you’ll be happier if you spend that money on tickets to a Broadway show, seeing a special exhibit at a museum, or on a box of macarons from Ladurée. Even if this doesn’t technically save you money, at least it will be money better spent.


4. If you can’t resist a souvenir, plan what you want or what you’ll spend ahead of time.

Every trip we go on, I purchase an ornament for my souvenir. I love filling our tree with our memories of our travels every Christmas, and it takes the stress out of what to buy when we’re on vacation. If you plan what you want to purchase or at least your souvenir budget ahead of time, you’ll be much less likely to go crazy at that random kiosk in Times Square.

Broadway Lion King

5. Souvenirs get cheaper the FURTHER you get from Times Square.

That yellow NYC Taxi shirt you have to have? Chances are it’s about half the cost at a souvenir shop a few blocks further away from Times Square. Times Square is a major tourist trap, so basically everything in the vicinity is overpriced. If you have the time, explore the area further from Times Square. Actually, plan to explore areas away from Times Square. They’re much more relaxing, beautiful, and empty than Times Square, guaranteed!

Central Park Foundtain

6. WALK.

Walk around! Don’t take a taxi, or a bus tour, or a pedicab. WALK! You can see much more of the city that way! Plus, New York City is so easy to get around by walking. You can stop and admire things that interest you, and you may stumble across a hidden gem on your journey. Would you rather pass by the New York Public Library quickly from a double decker bus, or walk up to it and explore the inside on your own time? If you’re in a rush or can’t handle too much walking, try an Uber. If you’ve never used Uber, use my referral code to sign up, and get your first ride free! My referral code is: alil599ue.

brownstone

7. AVOID CityPass & Tour Buses. 

CityPass MAY be a good deal, if you complete EVERY attraction included in the ticket. However, their pricing “includes” full price tickets for places that are actually “pay what you wish.” Therefore, they may not be the exceptional value that they seem. And tour buses are a waste. As I mentioned above, the city is so walkable, and riding on a bus means you can’t see things up close or stop when you want to explore an area more. Yes, many of them are “hop on and off,” but we often saw long lines of people form that were waiting for the next available bus. Why sacrifice valuable time when you could simply walk to your next destination and enjoy the city along the way?

Metropolitan Statues

8. “Pay what you wish” at certain museums. 

Most notably, the Metropolitan Museum of Art and the American Museum of Natural History, are both pay what you wish. That means, technically, that you could pay 1 cent for your ticket. While both have suggested donation ticket prices, you are not held to these prices at all! It’s as easy as walking up and saying, “Two tickets for $10, please.” Simply decide how much you feel comfortable paying for your ticket, and offer that amount. While certain exhibits have an additional fee, the majority of these museums are included with a base ticket. Many other museums in NYC offer pay what you wish or free visitation days as well. Do your research if there are any you’re hoping to visit!

Metropolitan

9. Use the subway!

Yes, I know this contradicts what I said about walking everywhere. While NYC is much more walkable than other cities, it’s also VERY big. For example, it would take roughly two hours to walk from the Met to the Brooklyn Bridge. Sometimes the subway isn’t the easiest or quickest option, but you should definitely consider it. It may seem a little intimidating at first, but there are plenty of helpful people around if you have a question. It can cut down on your travel time, plus it’s a memorable experience! Beware of altered/delayed schedules as well!

Central Park

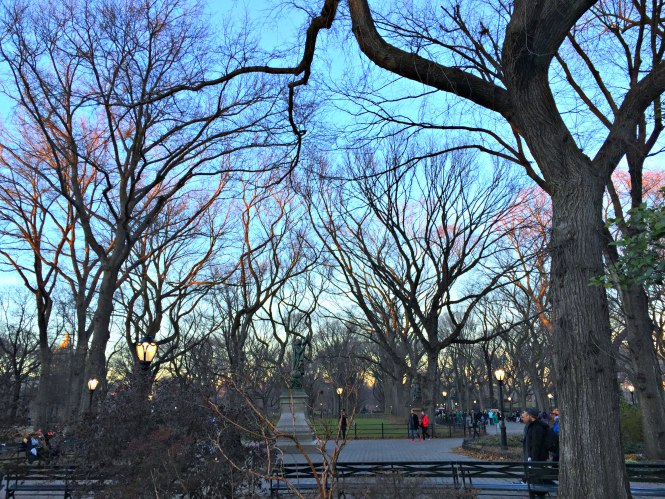
10. Visit free attractions.

So many noteworthy spots in New York are totally free to enjoy! A few that come to mind right away are Central Park, the New York Public Library, the High Line, the Staten Island Ferry, and more! A quick Google search will offer up list upon list of free things to see and do in New York City! Peruse those and make a list of fun and free things to do on your visit! Leisurely strolling through Central Park was one of our favorite activities in the city, and it never got old.

Natural history whale

Like I said, vacations are inevitably expensive. However, hopefully these tips will help you save some cash or at least feel better about the money you do spend! Most importantly, have fun and make memories in one of the most exciting cities in the world! Feel free to browse my #TraveLANG hashtag on Instagram to see more travel tips & ideas!

New York Public Library

Any questions about specifics of one the tips I mentioned? Comment below, and I’ll do my best to help out!

Times Square

Retro Siggy

Continue Reading

Nivea Men Sensitive Post Shave Balm AS A PRIMER!

Nivea Men Sensitive Post Shave Balm 0.5

If you bounce around in the makeup world at all, you’ve probably heard of this amazing “makeup hack.” If you haven’t, listen up! Nivea Men Sensitive Post Shave Balm makes an AMAZING primer. Yes, I know that isn’t its purpose, but isn’t that the whole idea behind a hack?? Nivea Men Sensitive Post Shave Balm 0

The first person credited with this fabulous discovery is NikkieTutorials in this video. Apparently, glycerin is the second most used ingredient in Nivea Men Sensitive Post Shave Balm, which helps your foundation cling onto your skin. It’s works wonders if you’re trying to achieve a flawless look all day long. It is also alcohol free, so it won’t dry your skin out.Nivea Men Sensitive Post Shave Balm 1

All you have to do is shake it up, and rub it all over your face and neck before applying your foundation. It’s very thin, so it dries quickly. I should also warn you that it definitely has a very masculine scent. However, don’t be dismayed! The smell definitely diminishes once it dries, and it’s worth it for the fabulous results!
Nivea Men Sensitive Post Shave Balm 2.5

I have been using this as a primer for around a year now, and it stays on through everything! Hot, cold, rainy, sweaty, humid, you name it, my foundation stays put! I always use liquid foundations, and every foundation I have tried works fabulously with this post shave balm as a primer. It’s a miracle worker! Even better, it only costs about $7! That’s only $2.12 an ounce! By comparison, Smashbox Primer is $36 an ounce! Nivea Men Sensitive Post Shave Balm 2

You really can’t beat the price and quality if you’re looking for a primer. Nivea Men Sensitive Post Shave Balm is easily found at many drugstores and big box retailers, so if you’re in the market for a new primer grab this to try! You can maintain a beautiful matte finish for pennies a day! That sounds pretty wonderful to me.

Do you know of any other makeup hacks I should try? Let me know!

Retro Siggy

This post contains affiliate links, which means if you click on these links or make a purchase using these links, I may receive a small percentage of the profit at no additional cost to you. Thank you for supporting Hoots of a Night Al!

Continue Reading

3-Ingredient Roast Chicken

Roasted Chicken 0

This recipe creates the most delicious, moist chicken, with minimal time and effort. All you need is chicken, lemons, and salt & pepper! Sound too good to be true? Read on!
Roasted Chicken 2

Now, this isn’t the chicken recipe to bust out when you want to impress your friends at a dinner party. (Also, stop trying to impress your friends, they already love you…just be yourself.) It is however, simple, delicious, and goof-proof, which is EXACTLY how I like my recipes.

The only ingredients you need are a whole chicken, salt & pepper, and lemons. I usually get the Young Whole Chicken from HEB pictured below, which is roughly 3 pounds. That is more than enough for myself and my husband, but feel free to get a larger chicken if you’re cooking for more.

Roasted Chicken 3

Preheat the oven to 350 degrees. Wash and dry your chicken and remove any of the included “innards” (I know that is the correct word, it just felt like it needed quotes.). Take your lemons and pierce them repeatedly on all sides with a fork to create holes. Liberally salt and pepper your chicken inside and out, and stuff the punctured lemons into the cavity. Roasted Chicken 4.5

I’ve cooked this on a baking sheet, in a dutch oven, and in a casserole dish, and each time it comes out great. The latter two are better, however, if you want to save the delicious juices to spoon over your chicken or for future recipes. Whatever you choose, lay the chicken breast-side down into a baking dish you’ve brushed with olive oil or pam, and place it into the oven. Cook for 1 hour at 350, and roughly 20 minutes at 400. (Your cooking times may vary if you are cooking a larger chicken.)

Roasted Chicken 1

Once you have insured your chicken is fully cooked (165 degrees internal temperature), remove it from the oven, and let it rest on a cutting board for at least ten minutes. After that, carve into your delicious chicken, and enjoy! I typically squeeze the lemons over Louis’s chicken as he loves the citrus flavor, and you can also spoon the pan sauce over the chicken.

Roasted Chicken 4

This chicken is so delicious, moist, and flavorful without being super lemony. I’m not a fan of lemon, so I was worried when I first cooked this, but the lemon flavor really doesn’t come through. It seems they just help the chicken stay juicy while cooking.Roasted Chicken 5

This dish can be paired with potatoes, salad, vegetables, or whatever you’re craving! If you’re trying to cook a whole chicken for the first time, try this simple recipe, and I know you won’t be disappointed!


3-Ingredient Roast Chicken

Ingredients

  • Whole Chicken
  • Lemons
  • Salt & Pepper

Instructions

  1. Wash and dry chicken and remove innards.
  2. Pierce lemons repeatedly with fork.
  3. Liberally salt and pepper inside and outside of chicken.
  4. Insert lemons into cavity.
  5. Bake at 350 for 1 hour, and 400 for 20 minutes.
  6. Let chicken rest for 10 minutes on cutting board.
  7. Carve and enjoy!


Retro Siggy

This post contains affiliate links, which means if you click on these links or make a purchase using these links, I may receive a small percentage of the profit at no additional cost to you. Thank you for supporting Hoots of a Night Al!


Continue Reading

Urban Decay Naked 3 Eyeshadow Palette Matte Look

Urban Decay Naked 3 1

A couple of months ago, I shared my thoughts on the Urban Decay Naked 3 Palette. In my previous post, I mentioned that I wanted to share some looks I create using that palette, and this post is exactly that! Urban Decay Naked 3 3

I used four shades from the palette, Strange, Limit, Nooner, and Darkside. They are all matte, except for Darkside, which is a satin finish. These are the descriptions for each shadow according to Urban Decay: “Strange (pale neutral pink matte-satin), Limit (light dusty rose matte), Nooner (medium pinky-brown matte), Darkside (deep taupe-mauve satin).”

Urban Decay Naked 3 4

Urban Decay has a great eyeshadow primer, Primer Potion, that I used under these shadows. It really helps the colors pop and keeps your shadow crease-free and in place all day.
Urban Decay Naked 3 5

I used Limit all over my lid and as a transition shade. It’s a fabulous neutral that goes well with so many different color combinations. I blended Nooner in strategically to darken it slightly before adding Darkside in my crease. Strange is my current favorite shadow for highlighting my brow-bone. It’s perfectly bright and crisp without being shimmery or over the top.

Urban Decay Naked 3 2

I also used a combination of Nooner and Darkside to line my lower lash line. It’s great to line your lower lash line with corresponding shadows for a softer look than eyeliner. Urban Decay Naked 3 7

I still love the Urban Decay Naked 3 palette, and I know I’ll be able to use it for so many looks in the future! The matte shades I used for this look were just as smooth and blendable as the shimmer shadows, which I really appreciated. Urban Decay Naked 3 9

If you’re looking for a great eyeshadow palette that you can use for a variety of looks, I would still happily recommend this one! Let me know if you have a favorite look with the Urban Decay Naked 3 palette that I should try!

Retro Siggy

Foundation: Maybelline Fit Me Matte and Poreless

Concealer: Maybelline Fit Me

Bronzer: NYX Matte Bronzer

Blush: Wet n Wild Color Icon Blusher Pearlescent Pink

Eyeshadow: Urban Decay Naked 3 Palette

Eyeliner: Maybelline Unstoppable Eyeliner

Mascara: Covergirl Clump Crusher Extensions LashBlast Mascara

Lipstick: Le Marc Lipstick by Marc Jacobs in Kiss Kiss Bang Bang

This post contains affiliate links, which means if you click on these links or make a purchase using these links, I may receive a small percentage of the profit at no additional cost to you. Thank you for supporting Hoots of a Night Al!


Continue Reading

Purpose Box

Purpose Box 1

“The purpose of human life is to serve, and to show compassion and the will to help others.” -Albert Schweitzer

This Schweitzer quote personifies the mission behind Purpose Box. Creator Jolie Gray, acted on her own desire to “do something,” and this amazing initiative is the result. Purpose Box is a bi-monthly mail subscription box filled with purchase with purpose items.

Purpose Box 2

Each item is hand-selected with the constant mindset of helping others. Every product in the box has been extensively researched and has its own mission to help others in need. Also, each Purpose Box, has its own purpose. Shocking, right? 😉 Each individual box supports a different cause. So far they have supported adoptions, birth mother retreats, and NICU nesting suites, among others.
Purpose Box 4.1

Recently, I attended a wonderful event to celebrate Purpose Box’s 2nd Anniversary, and I got to see some of the amazing items they distribute firsthand. The items pictured above are what we all received in our swag boxes, and let me say, they were such a treat!

Purpose Box 4.5

The items ranged from beautiful stationary to adorable accessories to tasty treats and more! I couldn’t believe the wide array of products available that support so many different causes. It made me realize how easy it can be to shop with purpose every day.

Purpose Box 4.6

Being the lucky duck that I am, I also won a previous Purpose Box shipment! I was so delighted, because it was filled with even more amazing things! The items pictured below were received by purchasers of the most recent Purpose Box. Each Purpose Box is $40, and from my calculations, the value of what you receive is well above $40.

Purpose Box 5

The selected pieces are diverse, well-made, and actually useful items. Plus, I love that it has things like this Project 7 Rainbow Ice gum, which I can buy at my local HEB. Without Purpose Box, I never would have thought to pick it up because I didn’t realize it sponsors Anti-bullying Programs for kids (plus it tastes delicious!). Part of the idea behind Purpose Box is to encourage people to shop more mindfully and purchase for-purpose items whenever they can.

Purpose Box 6

Possibly the most important part of each Purpose Box is a card letting the buyer know what cause is being supported that month, as well as what each item supports. This particular box said it “helped provide sustainable employment and quality of life for those in developing countries, give back to seven areas of need both in the US and abroad, fight ovarian cancer, provide business education for women, and provide gifts of gratitude for those enduring medical treatments, returning vets, and/or teachers.” Whew! Yes! ALL of that is being supported with just ONE box! Pretty amazing, right?

Also, ALL of the proceeds from that month’s Purpose Box went to OneHope27, which helps aid in the Foster care crisis. Yes, ALL of the proceeds.

Purpose Box 9

It could not be more clear to me that Jolie’s mission with Purpose Box is so pure. Her idea has already supported so many remarkable organizations, and I can’t wait to see what inspiring groups she will partner with in the future. Plus, if the prospect of helping that many people doesn’t get you excited (are you crazy??), she’s a fellow Aggie, so that should be reason enough. 😉

Purpose Box 10

Thank you Jolie, for starting such a remarkable business and sharing your passion with everyone! If any of my readers are interested in purchasing their own Purpose Box or any of the items I pictured above, I will include all of the links below! Purpose Box is bi-monthly, and they sell out very quickly, so make sure to sign up to find out when the next shipment is ready for purchase! Besides, what could be better than receiving a box of things you’ll love in the mail?? Oh wait, I know. Knowing that each and every item included helped someone in need. So amazing.

Retro Siggy

Purpose Box: Website, Instagram, Twitter, Facebook

Hands Producing Hope: Website, Instagram, Twitter, Facebook

Tribute: Website, Instagram, Twitter, Facebook

Buy the Change: Website, Instagram, Twitter, Facebook

Banded: Website, Instagram, Twitter, Facebook

Writefully His: Website, Instagram, Twitter, Facebook

Kurandza: Website, Instagram, Twitter, Facebook

Auggie Apparel: Website, Instagram, Twitter, Facebook

Two Sparrows Roasting Co: Website, Instagram, Twitter, Facebook

Marie Mae: Website, Instagram, Twitter, Facebook

107 Market Street: Website, Instagram, Twitter, Facebook

Project 7: Website, Instagram, Twitter, Facebook


Continue Reading