Custom Shampoo & Conditioner from Formulate (+ A GIVEAWAY!)

ENTER TO WIN YOUR OWN CUSTOM SET OF SHAMPOO & CONDITIONER FROM FORMULATE HERE!

Does anyone else spend what feels like forever walking up and down the haircare aisles at the store trying to figure out which products to buy? Some products promise volume but don’t protect from frizz. Some are anti-dandruff but aren’t for color-treated hair. Some are great for curly hair but you hate the scent. Surely you can relate. Wouldn’t it be amazing if you could have a shampoo and conditioner created just for your hair needs and mailed right to your door? Enter Formulate.

Formulate reached out to me a few months ago to see if I would be interested in receiving a set of products created just for me to test out. As someone who struggles with oily, straight hair AND lives in a crazy humid climate, I was psyched to try it out! They sent over a fun, simple quiz to determine my hair needs, and then they started creating my custom formula. I was amazed at how the quiz really nailed my hair concerns!

As I mentioned above, I have straight, fine, oily hair. The goals for my haircare were to volumize, prevent frizz and thinning, and add thermal protection. Basically, I was hoping my hair would look thicker but still remain smooth and shiny. Plus, I was so thankful to have the anti-frizz component because every Houstonian knows what its like to battle the humidity! They take so many factors into account to solve a myriad of hair issues! The questions covered whether or not my hair was color treated, hair texture and length, scalp sensitivity, hair thickness and moisture, and more! You even get to pick your scent and the strength you want it.

One of my favorite things about the creation process is the fact that Formulate has actual chemists and engineers working on their formulas to ensure they’re perfect for each client. They even include a list titled “ingredient insight” with your package, so you can see some of the ingredients in your shampoo and conditioner and exactly how they’re helping to improve your hair. My other favorite thing about working with Formulate was their customer service. They were consistently checking in with me to confirm that my formulas were working out for me and seeing if anything needed to be tweaked. At one point, I mentioned the scent I received was too floral for my liking, and they immediately reformulated my products and sent a different scented option over. The exceptional customer service wasn’t just because I was collaborating with them either. I truly believe this is how they treat all of their customers!

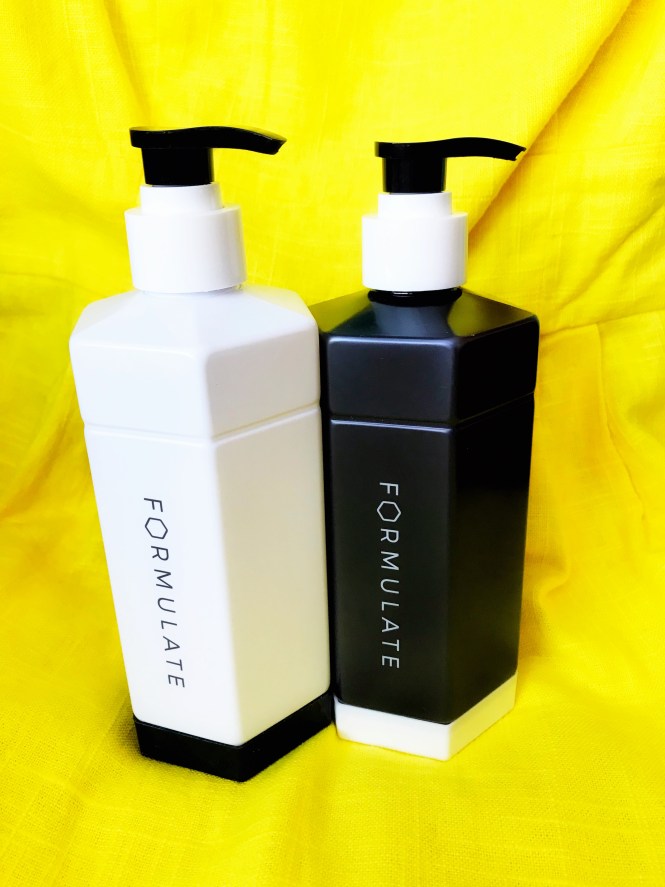
I have been using my Formulate shampoo and conditioner for a couple of months now, and I’m in love! They have made my hair feel healthier, thicker, and more voluminous with minimal styling.🙌🏻 I just wash and condition my hair according to the instructions they provided, blow dry it wth my favorite blowdryer, and I’m done!

I love that now I have the perfect hair products created JUST for my hair type, and I would love for you to have the same experience! Using the link below, you can enter to WIN your own set of custom shampoo and conditioner from Formulate! I just know you’ll love it as much as I do…plus, think of all the time you’ll save not having to wander up and down the hair aisles. 😉

ENTER THE GIVEAWAY HERE!

This post was created in collaboration with Formulate, but, as always, all opinions are my own.

Continue Reading

Best at Home Teeth Whitening! (+GIVEAWAY!)

**Don’t forget to enter the $149 giveaway at the bottom of this post!**

One of the #1 duties of a beauty blogger is to take selfies. Hundreds and thousands and millions of selfies. Fine, I may be exaggerating (though not by much), but the fact remains that I spend a lot of time taking and looking at pictures of myself. This inevitably leads to me analyzing every inch of my face.

Do I need to tweeze by eyebrows? (Yes. Always yes.)

Did I blend my contour enough? (Nope. Never.)

Are my nostrils different sizes? (Left is definitely bigger.)

Are my teeth white enough? (ENTER SMILE BRILLIANT.)

Smile Brilliant provides dental quality teeth-whitening for a fraction of the cost you would pay your dentist (we’re talking less than $200!) for the Exact. Same. Treatment. AND, the exact same RESULTS! Even better? You get to whiten your teeth on your own schedule from the comfort of your own home. Let me back up.

The kindest, most helpful employee at Smile Brilliant reached out to me a few months ago to see if I would be interested in trying their whitening kit. A few days after filling out a quick questionnaire, I received a package containing everything I needed to create a mold of my teeth. This alone would have been worth the price of the kit. I felt like a mad scientist…er, dentist mixing the paste and creating my impressions. Such a fun experience!

I mailed back my impressions and received my custom whitening trays less than two weeks later. I loved that the trays were made specifically for my teeth unlike whitening kits you can buy at the drugstore. They really allowed the gel to cover every nook and cranny of my smile. Plus they came with a convenient case perfect for storage and travel.

The whitening kit came with several syringes of Teeth Whitening Gel and Desensitizing Gel as well as extensive instructions on how to use both. The process varies depending on your desired results and personal tooth sensitivity. For example, the recommended whitening session time ranges from 45 minutes up to 3 hours. A little goes a long way with the syringes as well; each one contains enough gel for three to four treatments!

The trays were comfortable to wear, easy to apply gel to, and simple to clean. I performed a few whitening sessions, but during one session, I began experiencing some gum sensitivity. My sweet Smile Brilliant consultant assured me that is totally normal. She also recommended many solutions, including a simple fix of applying vaseline or coconut oil to my gums to prevent irritation. The quick and helpful response time was actually one of my favorite things about Smile Brilliant. Every question I had through this entire process has been answered thoroughly and honestly!

After a few treatments, I realized that I was already pleased with the natural whiteness of my teeth, so unfortunately I don’t have any dramatic before and after pictures to share in this post. Luckily for you though, there are tons of real life results you can see over on Smile Brilliant’s Instagram account. Their review page is also full of incredible smiles and praise. Below is a before and after example from a fellow blogger, Nyema of Steps to Serendipity. See her full Smile Brilliant review here.

Pretty impressive, right??

I may decide to utilize my unopened syringes before they expire (they conveniently have quite a long shelf life according to Smile Brilliant), and, if so, I’ll update you with some “after” pictures then. Who knows what my incessant selfie analyzing will result in? 😉 Considering that seeing results generally only takes around 2 weeks (or less!), I may sneak in some whitening before my next big event! In the mean time, I wanted to share my positive experience using the whitening kit and receiving exemplary customer service from Smile Brilliant with you.

Perhaps the best news of all is that Smile Brilliant is giving you a chance to win your OWN whitening kit! Enter through the link below, and good luck! If you don’t want to wait to see if you win, use code hootsofanightal15 to get $15 off!

**SMILE BRILLIANT GIVEAWAY**

**This product was gifted for review by Smile Brilliant, but all opinions are my own.**

*Giveaway is open for two weeks. You MUST enter through the link to be counted.  Giveaway is for $149 credit- and is open to USA, UK, Canada, and Australia residents.*


How to Whiten Your Teeth

Continue Reading

wet n wild Photo Focus Foundation

wet n wild recently (ish?) released a new line of Photo Focus products, that they claim will help you achieve flawless, camera-ready makeup in any lighting condition. With the liquid foundation priced at only $5.99, I was anxious to try it out!

The wet n wild Photo Focus Foundation, has a wide range of 20 colors, so hopefully most people can find a matching shade. I debated on which color to try, and wound up purchasing Nude Ivory. It’s an excellent match for my skin! (I think, at least? Feel free to let me know if I’m way off. 😂)

The packaging is convenient, and has a sort of spatula wand that makes it very easy to distribute the product onto your face. I use about 2 spatula’s worth (if that makes sense), and blend out the foundation with my Beauty Blender or wet n wild’s flat top brush

I think the coverage is medium to heavy, which I prefer. I did still go in with Maybelline’s Fit Me Concealer to brighten up my under eye area, but I was pleased with how well the foundation covered my natural redness. 

I’ve been using this foundation off and on for a couple of months now, and I feel like I definitely need to set it all over with powder, or it makes my skin very greasy. I have combination skin, and usually setting my T-Zone with powder is enough to keep me oil-free all day, but that isn’t the case with this foundation. I use the highlighter side of wet n wild’s contour palette to set this makeup, and it works great. There is also a complimentary wet n wild Photo Focus powder, but I haven’t tried that yet. Just be warned that unless you have very dry skin, I would definitely set this foundation with powder.

Aside from the oiliness, the wear time on this foundation is pretty good. If you typically touch up your makeup, I’d guess you won’t need to do so until about four or five hours of application. If you’re naturally oily, one blotting sheet around that time and you should be good to go for awhile longer.

Another point I wanted to mention is that this product definitely has a bit of a chemical smell. It does fade once it dries on your skin, but if you’re sensitive to smells, maybe give this one a whiff in the store before purchasing. 

The main claim of the Photo Focus line is to prevent flashback regardless of lighting conditions. I used natural light to take the photos above (as I usually try to do), and I definitely see pretty flawless results. I haven’t tested this makeup with a flash or in different lighting conditions, but in daylight at least, I’m very pleased. 

At only $5.99 (or less if you can find a coupon at your store!), I would definitely recommend this foundation. If you want a medium to high coverage look, and you’re willing to put in the effort to set the foundation, there aren’t many downsides to this product! 

wet n wild has definitely stepped up their game in the last few years, and this wet n wild Photo Focus Foundation is no exception! Have you tried any other products from wet n wild recently? Let me know!


Primer

Nivea Men’s Sensitive Post Shave Balm (Full Review)

Foundation

Wet n Wild PhotoFocus Foundation in Nude Ivory

Concealer

Maybelline Fit Me Concealer in Fair 15 (Full Review)

Setting Power

Wet n Wild MegaGlo Contouring Palette in Dulce de Leche

Contour

Wet n Wild MegaGlo Contouring Palette in Dulce de Leche

Bronzer

Physicians Formula Butter Bronzer

Blush

Milani Baked Blush in Luminoso (Full Review)

Highlighter

Wet n Wild MegaGlo Illuminating Palette in Catwalk Pink (Full Review)

Eyeshadow Primer

Maybelline Eye Studio Color Tattoo Metal in Barely Branded (Full Review)

Eyeshadow

Urban Decay UD XX Vintage Eyeshadow in Gash (burgundy shade)

MAC Cosmetics Eyeshadow in Blanc Type (brow bone)

Eyeliner

Maybelline Unstoppable Eyeliner in Onyx (Full Review)

Mascara

Covergirl Super Sizer Fibers Mascara (Full Review)

Eyebrows

Ulta Brow Powder in Medium

Lips

Bite Beauty Matte Creme Lip Crayon in Red Velvet (Full Review)

Tools

Beauty Blender

Real Techniques Buffing Brush

Wet n Wild Large Eyeshadow Brush

Wet n Wild Crease Eyeshadow Brush

Wet n Wild Contour Brush

Wet n Wild Angled Liner Brush

Wet n Wild Flat Top Brush

This post contains affiliate links, which means if you click on these links or make a purchase using these links, I may receive a small percentage of the profit at no additional cost to you. Thank you for supporting Hoots of a Night Al!


Continue Reading

Maybelline Dream Cushion Liquid Foundation

According to their website, Maybelline’s “Dream Cushion Fresh Face Liquid Foundation delivers complete luminous coverage for fresh-faced perfection.” I only agree with some of that statement. While it does give you a luminous, fresh-faced look, I don’t think it gives you complete coverage or perfection. I recently received the Dream Cushion Foundation to try for free from Influenster

This is the first cushion foundation I have ever used, so I was excited to test it out. I decided to try it for the first time with the cushion applicator included in the package. According to the instructions, you’re supposed to simply slip the cushion onto your fingers, press it into the cushion foundation, and tap it onto your face to apply the foundation. I found this method gave me moderate coverage, but it took a very long time to ensure there weren’t any bare patches or streaks. 

For my second application attempt, I used my damp Beauty Blender. Once again, I pressed the blender into the cushion foundation and applied it to my face using a tapping motion. This worked slightly better than the cushion method, but it made the already light coverage of the foundation even sheerer. 

Finally, I tried applying the foundation with my Real Techniques Expert Face Brush. I dabbed my brush into the cushion foundation, stippled it onto my face, and buffed it out. This definitely seemed like the best application method to me, so consider trying different techniques if you purchase this foundation. 

I found that the Maybelline Dream Cushion Foundation provided a luminous, dewy affect. However, the coverage was definitely lacking. I tried to build up the foundation some, but it didn’t provide that flawless, matte look I’m used to wearing. (Duh, I don’t think it’s meant to.)

It definitely smoothed out many of my imperfections and evened out my skin tone, but I still had to use a lot of concealer for certain areas. Also, it did not wear well at all. I have combination skin, and anywhere I generally get oily, this foundation slid right off my skin. I did wear it with a primer and setting powder, but that didn’t seem to help at all. 

I don’t think this claims to be a long-wearing foundation, since Maybelline advertises how easy it is to apply this on-the-go and carry it with you at all times. However, once I apply my foundation I add concealer, setting powder, contour, bronzer, blush, and highlighter…pretty sure if my original foundation is coming off, I don’t want to apply a second layer on top of all that. 

Negatives aside, I do think this is a great foundation. If you’re someone who wants to simply even out your skin tone and prefer a fresh-faced look, this could definitely be the foundation for you. I think it would work best on dry skin types. However, with the right combination of primer and setting powder, it may work for any skin type. I can see myself using the Maybelline Dream Cushion Foundation on days when I’m running errands and just want a bit of foundation and some mascara. 

There are currently 8 shades (for reference, I’m wearing shade 20 Classic Ivory), and this will set you back about $16. That’s a little high for a drugstore foundation to me, so if you’re on the fence, purchase it somewhere that is good about returns like Ulta.

Have you tried the Maybelline Dream Cushion Foundation? Any tips for me to help it stay put longer?

Primer

Nivea Men’s Sensitive Post Shave Balm (Full Review)

Foundation

Maybelline Dream Cushion Foundation in 20 Classic Ivory

Concealer

Maybelline Fit Me Concealer in Fair 15 (Full Review)

Setting Power

Wet n Wild MegaGlo Contouring Palette in Dulce de Leche

Contour

Wet n Wild MegaGlo Contouring Palette in Dulce de Leche

Bronzer

Physicians Formula Butter Bronzer

Blush

Wet n Wild Color Icon Blush in Pearlescent Pink

Highlighter

Wet n Wild MegaGlo Illuminating Palette in Catwalk Pink (Full Review)

Eyeshadow Primer

Maybelline Eye Studio Color Tattoo Metal in Barely Branded (Full Review)

Eyeshadow


Urban Decay Naked 3 Palette (Full Review)

Eyeliner

Maybelline Unstoppable Eyeliner in Onyx (Full Review)

Mascara

Covergirl Super Sizer Fibers Mascara (Full Review)

Eyebrows

Ulta Brow Powder in Medium

Lips

Revlon Matte Balm in Sultry (Full Review)

Tools

Beauty Blender

Real Techniques Buffing Brush

Wet n Wild Large Eyeshadow Brush

Wet n Wild Crease Eyeshadow Brush

Wet n Wild Contour Brush

Wet n Wild Angled Liner Brush

This post contains affiliate links, which means if you click on these links or make a purchase using these links, I may receive a small percentage of the profit at no additional cost to you. Thank you for supporting Hoots of a Night Al!

I received this product for free to review, but, as always, all opinions are my own.

Continue Reading

Valentine’s Vibes: Burgundy & Bronze

Happy February, friends! With Valentine’s Day quickly approaching, I thought it would be fun to share a few different Valentine’s makeup looks. First up is a look I’m calling, Burgundy & Bronze. With blue eyes, I always love using red-toned eyeshadow, because it makes my eyes pop more. However, I think reddish shadows can look amazing on anyone!

I opted for a red-burgundy crease color, bronze lid, and soft burgundy lip. As you can see below, I always use shadow to line under my eye as well. I love how it allows your eyeshadow look to have more impact. To compliment my shadow, I used a shimmery, peach blush and (a heaping load) of highlighter. Overall, I feel like this is a bold, but not over-the-top makeup look anyone could rock for an amazing Valentine’s Day date, party, or Galentine’s celebration!

If you’re a fan of this look, check out my full list of products after the pictures! Thanks for reading, and I’ll be back soon with more Valentine’s looks!

Here is the entire list of products I used for this look. If you have questions about any product or tips for how I created my makeup look here, please let me know!

Primer

Nivea Men’s Sensitive Post Shave Balm (Full Review)

Foundation

Wet n Wild PhotoFocus Foundation in Nude Ivory

Concealer

Maybelline Fit Me Concealer in Fair 15 (Full Review)

Setting Power

Wet n Wild MegaGlo Contouring Palette in Dulce de Leche

Contour

Wet n Wild MegaGlo Contouring Palette in Dulce de Leche

Bronzer

Physicians Formula Butter Bronzer

Blush

Milani Baked Blush in Luminoso (Full Review)

Highlighter

Wet n Wild MegaGlo Illuminating Palette in Catwalk Pink (Full Review)

Eyeshadow Primer

Maybelline Eye Studio Color Tattoo Metal in Barely Branded (Full Review)

Eyeshadow

Urban Decay UD XX Vintage Eyeshadow in Gash (burgundy shade)

Urban Decay Eyeshadow in Baked (bronze shade)

MAC Cosmetics Eyeshadow in Blanc Type (brow bone)

Eyeliner

Maybelline Unstoppable Eyeliner in Onyx (Full Review)

Mascara

Covergirl Super Sizer Fibers Mascara (Full Review)

Eyebrows

Ulta Brow Powder in Medium

Lips

MAC Cosmetics Lip Pencil in Half-Red

Tools

Beauty Blender

Real Techniques Buffing Brush

Wet n Wild Large Eyeshadow Brush

Wet n Wild Crease Eyeshadow Brush

Wet n Wild Contour Brush

Wet n Wild Angled Liner Brush

This post contains affiliate links, which means if you click on these links or make a purchase using these links, I may receive a small percentage of the profit at no additional cost to you. Thank you for supporting Hoots of a Night Al!

Continue Reading
1 2 3 7