Easy Minimal Nail Art

Easy Nail Art 0

I’m no artist. Let me get that out of the way up front! My handwriting isn’t great, I can’t draw worth a poot, and in general, I’m not super artistic. However, I love painting my nails (okay…that’s a lie, but I love having painted nails), and I’ve always wanted to add a fun accent to them. I’m not big on the different color accent nail trend, but I still love a fun pop of nail art, and this is the perfect compromise!

Easy Nail Art 1

All you need for this minimal nail art look is Scotch tape and two colors of polish. I used Sally Hansen Complete Salon Manicure in Naked Ambition  (previous review here) and Revlon Nail Polish in Minted. For an even more minimalist look, you could paint the nail art on your naked nail, which would only require one polish (duh.).

Easy Nail Art 2

Paint your nails whatever base color you choose. Once they are completely dry, tear off two pieces of Scotch tape. I usually stick the tape on my hand and peel it off once to pick up some dead skin cells make it slightly less sticky. It needs to be sticky enough to stick onto your nail, but not so sticky it will pull off your base polish.

Stick the tape to your nails to form a triangle shape however large or small you’d like.

Easy Nail Art 3

Use your secondary color to paint over the tape and fill in the triangle shape you created. As soon as you’re done painting, peel off the tape to reveal your perfect triangle! Make sure you peel off the tape while the polish is wet, so you don’t accidentally pull up the dry polish with the tape. You can also add a top coat afterwards, if that’s your jam.

Easy Nail Art 4

Voilà! You’re done! I think this look is so fun, and I love that you can create so many looks with different colors and without any special nail art tools.

Easy Nail Art 5

You could paint the triangles on every nail or just one finger, like I did. The tape is fun to play around with as well because you could use it to make any number of shapes or designs on your nails.

Easy Nail Art 6

If you try this nail art, share a picture of it on Instagram and tag me! I’d love to see! 🙂 Feel free to pin the image below to help you remember the simple steps in the future!Easy Nail Art 7

As always, thanks for reading!

Siggy paint

This post contains affiliate links, which means if you make a purchase using these links, I may receive a small percentage of the profit at no additional cost to you. Thank you for supporting Hoots of a Night Al!


Continue Reading

Nail Polish Removal Hack!

0

Does anyone else out there paint their own nails still? I love having fresh polish on my nails, but one of my least favorite things to do is remove it! I feel like some polishes (like glitter!) can be so stubborn and hard to get off. However, a couple of years ago, I stumbled upon this “hack.” With nail polish remover and ONE cotton ball, I can remove ALL of my polish quickly and easily! Read on to see how!

2

You can use acetone (which is harsher on your nails) or nail polish remover. Simply pour a small amount into the cap. Next get one cotton ball and roll it out into a strip like the picture below.

3

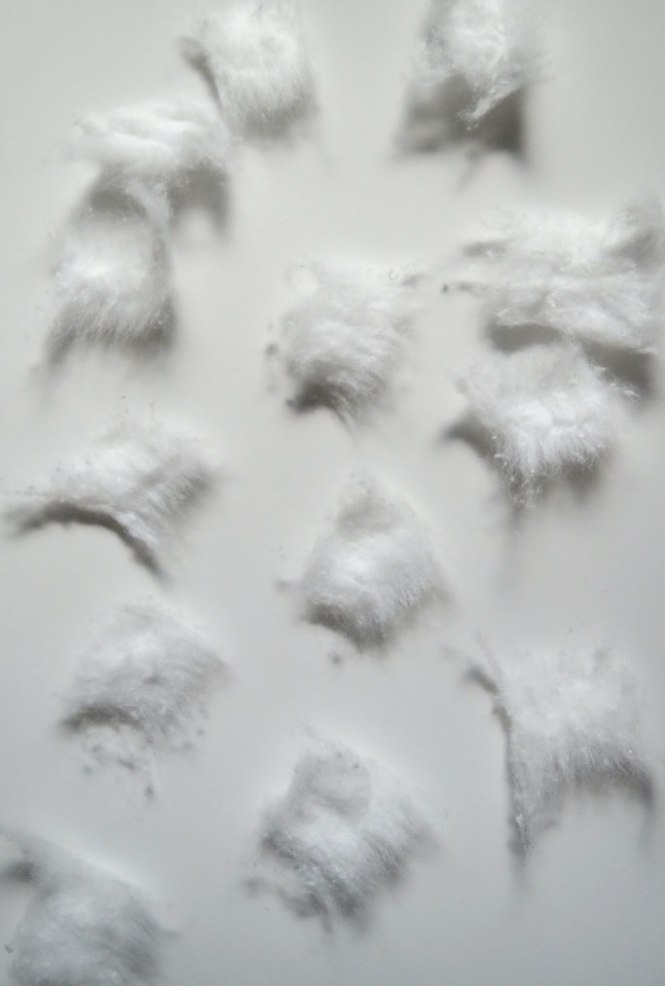
Gently, tear your cotton ball into ten small pieces.

4

Dip each piece into the nail polish remover, and press it onto your  nail making sure any part with polish is being touched by the polish remover. I typically do one hand at time.

5

Wait for around 15 seconds, grab the cotton ball piece, and slide it off your nail with some slight pressure. Voilà! Just like that, all of your polish is gone! 6

Like I said, I do one hand at a time, and it just takes a couple of minutes! No more scrubbing and using 15 cotton balls per hand. I hope this little tip saves you some time and cotton balls next time you’re switching polishes!

Siggy paint


1

Continue Reading

It's Just Another Manicure Monday…Easy Going

0

Happy Monday, y’all! For today’s Manicure Monday, I’m sharing my favorite light pink polish. This “so light it’s almost white” pink is Sinful Colors Easy Going. My mom gifted me this polish a couple years ago, and I’ve loved it ever since.

1It only takes about two coats to become opaque, and it’s relatively easy to apply. The brush is definitely thinner than OPI or Sally Hansen Complete Salon Manicure. If you prefer a brush more similar to Essie, this would fit the bill.

2Want to know how it doesn’t compare to Essie? A bottle of Easy Going will only set you back $1.99 at most drugstores. That’s 75% cheaper than a bottle of Essie or OPI! Some people may claim the quality isn’t as good, but they’re full of it. Just kidding. I know next to nothing about nail polishes. I’m sure there are factors that make different brands superior, but, with a good topcoat, Sinful Colors polishes stay on my nails just as long as some of my pricier polishes. I think their colors are great for when you want to try something new but don’t want to break the bank.

3This particular color is perfect for welcoming spring and Easter! It’s the lightest of pinks, but it isn’t sheer or shimmery like many other pale pinks. It really pops on my hands, and I always get compliments when I’m wearing it! If you’re a fan of pastel shades for spring, I’d definitely give Easy Going a spin. And make sure to check out the Sinful Colors section next time you’re at your local drugstore…with over 60 shades under $2, you’re sure to find something to try!

Black all caps siggy

Continue Reading