Disney After Hours at Animal Kingdom Review

Disney After Hours at Animal Kingdom…is it worth it? What is it? Is it right for my group? In this review, I’ll attempt to answer your questions while sharing the experience Louis and I had at the event. Read on to hear my thoughts!

Disney After Hours at Animal Kingdom is a ticketed event that happens on select nights at Walt Disney World’s Animal Kingdom (duh.). It costs $129 per person ($125 per person if purchased in advance), and allows you access to the park at 7:00 PM. The special event is from 8:30-11:30 PM when the park is only open to event ticket holders. Guests will receive unlimited popcorn, ice cream and bottled drinks and be able to enjoy the attractions listed below.

  • Avatar Flight of Passage
  • Na’vi River Journey
  • Pandora Drummers — Swotu Wayä
  • Expedition Everest — Legend of the Forbidden Mountain
  • DINOSAUR
  • Rivers of Light
  • Tree of Life Awakenings
  • It’s Tough to be a Bug!
  • TriceraTop Spin
  • And more!

Louis and I purchased tickets and attended Disney After Hours at Animal Kingdom on December 12, 2018, and *spoiler alert* WE LOVED IT. It may not be appropriate for everyone’s group, but it was perfect for us and we had an incredible time. We were already in the park before the event began, so we picked up our wristbands as soon as they were available near Discovery Trading Company. Disney cast members checked for these bands throughout the night to ensure only guests that had purchased tickets were enjoying the event.

Our main goal of the evening was to ride our favorite, popular rides as many times as possible since every ride had little-to-no wait time. We knocked out It’s Tough to be a Bug! and DINOSAUR first, since we wanted to spend most of our evening in Asia and Pandora. After DINOSAUR, we stopped for our first “complimentary” snacks in Dinoland U.S.A. We were happy to find popcorn, Mickey Premium Ice Cream Bars, Mickey Ice Cream Sandwiches, Strawberry Fruit Bars and bottled drinks. We grabbed a little bit of everything and set off to find the Yeti on Expedition Everest.

We were able to hop on and off Expedition Everest TEN times breaking occasionally for more free snacks (and/or to keep from barfing) and there was NEVER a wait. On a few expeditions, we were on an almost empty train! Expedition Everest is always one of our favorite rides, but it takes on a special quality at nighttime with the uplighting on the mountain and the extra dark interior sequences. We even caught part of a Rivers of Light performance from the mountain at one point! When we finally had our fill of Everest, we headed over to Pandora — The World of Avatar.

We had been in Pandora earlier in the day when it was swarming with guests, and it was amazing to see the land almost entirely empty. The lighting is beautiful and the atmosphere of the area is much easier to appreciate when you are some of the only people present. Our first stop was the Na’vi River Journey. Throughout our trip, the wait for this ride never dropped below 60 minutes, but at Disney After Hours we were able to walk on the ride, and ride it back-to-back in our own private boat! While the Na’vi River Journey is relaxing and beautiful, I wouldn’t want to wait an hour for it, so riding it during this event was the perfect solution.

Finally, we set our sights on Avatar Flight of Passage. This ride is INCREDIBLE and unlike anything else I’ve ever experienced. If you’ve ridden it, you know what I mean, and if you haven’t, you simply have to try it! Since Pandora is still a new land (and this ride is so amazing), the wait times are always astronomical and Fastpass+ reservations are hard to come by. We snagged two Fastpass+ reservations for our trip, but we knew we would want to ride it much more. Multiple banshee flights during After Hours was the perfect solution! We squeezed in FIVE flights in around an hour, and it really sealed the deal that the Disney After Hours event was worth the money to us! The cast members even let us loop right around back into the pre-show, so we didn’t have to traverse the massive queue each time. Once we had our fill of Flight of Passage, the After Hours event was almost over. We grabbed as many free bottled drinks as we could carry, sprinted back for one last Expedition Everest ride, and then the event ended! Louis obliged my desire for some empty park pictures in front of the Tree of Life, and we caught the last bus back to our resort.

As you may have gathered, we LOVED our Disney After Hours experience. I wanted to share some tips in case you are considering if it’s a good addition for your trip!

Eat dinner before the event begins. Since you only get three hours in the park without other guests, you don’t want to waste prime ride time eating (unless it’s free snacks as you run between attractions!). I’d recommend our forever favorite Flame Tree Barbecue or the new, yummy Satu’li Canteen (pictured below!).

Enjoy any attractions or shows that won’t be open during the event between 7:00 PM and Animal Kingdom closure. Everything we were looking forward to was open during After Hours, but this is something to be aware of!

Consider the heights of everyone in your group before deciding if this is a good value for you. DINOSAUR, Flight of Passage, and Expedition Everest all have height requirements between 40-44″, so if everyone in your party isn’t tall enough to ride, it may not be worth your money to attend Disney After Hours in Animal Kingdom.

Stock up on those “free” snacks! We ate and drank occasionally throughout the evening, but before leaving we grabbed as many bottled drinks as we could carry. Literally. They’re unlimited, so it’s best to get your money’s worth! We loaded up our backpack, threw them all in our mini fridge at the resort, and drank them the rest of our trip instead of buying them in the parks! At Disney, a bottled soda is $4.50 and a bottled water is $3.50, so we “saved” quite a bit by stocking up when these were unlimited.

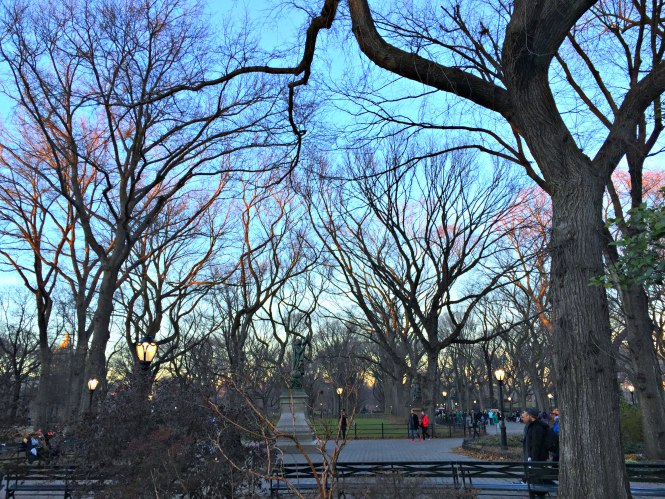
Make sure to soak up the ambiance as you walk throughout the park. Animal Kingdom is possibly the most beautiful park at Walt Disney World and the lighting and music really make it extra magical in the evening. One of my favorite parts of the night was walking hand-in-hand with Louis through the empty walkways in each area of the park. It was beautiful!

When all was said and done, we calculated that Disney After Hours in Animal Kingdom cost us under $5 a ride. Considering the cost of a Walt Disney World trip, we figured that was a great value for our time. Granted, we are only a couple, and this event would cost much more for a family. If you’re interested in Disney After Hours, but don’t love Animal Kingdom as much as we do, you may want to consider the events at Magic Kingdom or Hollywood Studios (there isn’t one at Epcot yet!).

Have you attended a Disney After Hours event? Let me know what you thought, and which event we should try on our next trip!

Continue Reading

iFLEW at iFLY San Antonio!

Louis and I have been together for 11 years. Yes, over a decade! We’ve done pretty much every date night in the book, so we’re always looking for fun, different activities to try. Enter, iFLY. They reached out to me, and asked if we’d like to come in for some complimentary flights, and we JUMPED at the chance…get it? 😉

In case you’re unfamiliar with iFLY, they are an indoor skydiving facility. Yes, you read that right. They provide flyers with the thrill of skydiving, without the risk of jumping out of a plane! Sound too good to be true? It’s not.

In fact, anyone from ages 3 to 103 can skydive, according to iFLY! (Sorry, if you live to 104, you’re out. 😉 I kid, I kid. ) It’s as easy as filling out a waiver, checking to insure you fit within the other parameters, selecting your flight package, and you’re in! They’ll even let you wear bright red lipstick, so you can unintentionally match your flight suit! I know, it just keeps getting better.

The iFLY team greeted us immediately upon arrival, got us quickly checked in, and minutes later, we were getting our flight training from our amazing trainer, Dave. The training was quick, but thorough, easy to comprehend and remember, and entertaining (thanks to our great trainer!). Next, we got to suit up! Your flight equipment includes a jump suit, ear plugs, goggles, and a helmet. (Make sure you wear lace-up shoes, as well! No flats, flip flops, or bare feet in the tunnel, please!)

Then, BAM, we were flying!! I mean, we had to go into the tunnel, wait our turn, yadda, yadda, yadda, but our flights came up even quicker than I was expecting! Louis went first and looked like a pro! At 6’4″, I was worried the tunnel would be too small for him, but he fit perfectly and did such a great job!

I’m definitely a daredevil, but something about the tunnel had me scared at first. Thankfully, about 5 children flew right before me, so they put my fear in its place. Thinking, “If they can do it, surely I can!” I stepped/fell/leapt into the tunnel, and I was flying!

Okay, full disclosure, our instructor was helping/holding me every second of the way, but still! I did it! And it was so fun! The time FLEW by, and before we knew it, our flights were over, and I was staggering around jelly-legged from the adrenaline rush.

We checked out the kiosks for our flight pictures and videos, got our super official flight certificates, and grinned from ear-to-ear! I love that they take high quality photos and video of your flight, so you don’t have to worry about trying to snap a blurry, grainy phone shot!

Tips from a self-proclaimed pro:

  • If you have long hair, BRAID IT, SLICK IT BACK, SHAVE YOUR HEAD (kidding.). I braided mine, but the few tendrils of hair that slipped out got twisted up like dreadlocks in the tunnel! Thankfully, they were easily brushed out, with minimal-to-no hair loss ;), but I can’t imagine if I had left it down!
  • Wear lace-up shoes! Not flats, flip flops, or slip ons…lace-up shoes only! I wore my trusty Mickey & Minnie Mouse sneakers, and they worked great. Thankfully, there are tennis shoes on site if needed, but I’m sure you’ll fly more comfortably in your own shoes!
  • Don’t be scared! Try and relax in the tunnel. If you hate the feeling you get in your stomach when you go down a rollercoaster drop, don’t worry! You won’t experience that sensation at all in the tunnel.
  • Trust your trainer. They will be within an arm’s length from you (or in my case, constantly holding your flight suit) the entire time you’re flying, and they do everything they can to make your flight experience safe, fun, and amazing!

iFLY San Antonio was such a cool, unique, fun, original, thrilling experience! If you’re looking for a new date night, an awesome birthday party, a great team-building event, or just want to try an exciting experience yourself, definitely check out iFLY…you won’t be disappointed!


 I received complimentary flight packages from iFLY San Antonio in exchange for this review, but, as always, all opinions are my own!

This post contains affiliate links, which means if you click on these links or make a purchase using these links, I may receive a small percentage of the profit at no additional cost to you. Thank you for supporting Hoots of a Night Al!

Continue Reading

Last Minute Christmas Gift Ideas!

0

CHRISTMAS IS NINE DAYS AWAY. Yes, you read that right. It’s rapidly rushing towards us with no signs of slowing down, and I have about 33.7% of my shopping done and NOTHING gift wrapped. Yes, I know the true meaning of Christmas is to celebrate the birth of Jesus, but I also love the spirit of giving surrounding the holiday.

If you’re like me, and Christmas snuck up on you this year, I’m here to save the day. Below are 20 gift ideas on Amazon that should suit many of the people in your life. I grouped them into categories to help you find exactly what you’re looking for. Thank goodness for Prime 2-day shipping, am I right? Happy Shopping!

For Someone Who Needs to Relax…

1

1. Bath & Body Works 3-Wick Candle, Eucalyptus Spearmint

2. Toms Women’s Slipper Loafers

3. Dr. Teal’s Pure Epsom Salt Soaking Solution

4. Spa & Resort Terry Velour Bathrobe


For the Fashionista…

2

5. Burberry Scarf

6. Zicac Women’s Fur Collar Batwing Cape

7. Sam EdelmanWomen’s Petty Ankle Boot

8. Fossil Jacqueline Stainless Steel Watch


For the Wannabe Chef…

3

9. Adjustable Bib Apron

10. Lodge Cast Iron Skillet

11. KitchenAid 6-Qt. Professional 600 Series Mixer

12. Cook it in Cast Iron


For the Beauty Lover…

4

13. Tarte Limited Edition Tarteist Toolbox Brush Set

14. Urban Decay Naked 3 Palette

15. Pink Chevron Cosmetic Bag

16. The Original Beauty Blender


For the Jetsetter…

5

17. Eccolo Faux Leather Passport Case

18. Jessica Simpson Jewel Plaid Hardside Spinner Suitcase

19. Beats Studio Wireless Over-Ear Headphone

20. Eccolo World Traveler Style Journal 


There you have it! 20 gift ideas at a variety of price points that will hopefully cover some of your shopping list! Regardless, remember it’s the thought that counts! Merry early Christmas!

Retro Siggy

This post contains affiliate links, which means if you click on these links or make a purchase using these links, I may receive a small percentage of the profit at no additional cost to you. Thank you for supporting Hoots of a Night Al!

Continue Reading

Mount Vernon

Mount Vernon 1

With all of the craziness occurring in politics currently, I’m reminded of our trip to Mount Vernon last February. It was both of our first times visiting, and we had a wonderful time.

When you first arrive, you enter the Ford Orientation Building and can take a picture with the Washingtons and their grandchildren. It’s a wonderful greeting to Mount Vernon and made us excited to start exploring.Mount Vernon 7

Once outside the building, we ventured along the pathways until we saw this beautiful sight across The Bowling Green. It was so exciting to see such a familiar building and know we would be stepping inside soon.

Mount Vernon 6

Mount Vernon 2

We journeyed around the East side of the mansion, where we found the Blacksmith shop. They have live demonstrations from modern-day blacksmiths who shared and showed how the shop was used during the time President Washington lived there.

Mount Vernon 3

We had a wonderful time exploring the grounds as well. George Washington is said to have taken great pride in the grounds and gardens of his home, and it shows. There was beautiful landscaping, paths and trails throughout the woods, and evidence of what I’m sure is a beautiful garden during the spring. We visited in late February, which I’m sure doesn’t show the landscaping at its peak, and we were still very impressed. Mount Vernon 9

One of my favorite parts of visiting Mount Vernon were the sweeping views of the Potomac River. The mansion was perfectly situated so that you could admire the natural beauty surrounding the property. Thankfully, the land situated across the Potomac has been preserved as parkland, so hopefully the views will survive for years to come. Mount Vernon 10

We spent the time before our scheduled tour simply enjoying the scenery and imagining what it must have been like to wake up with such beautiful views every morning. I would love to visit again on a sunny day or perhaps at sunset! I’m sure the views are stunning year-round.

Mount Vernon 4

Soon it was time for our guided tour, so we headed back to the west side of the mansion. Each tour is led by a friendly, knowledgeable tour guide, and I thoroughly enjoyed our journey through the home. It was amazing to picture our former President Washington penning a letter at his desk, or imagine the former first lady greeting visitors in the foyer. The mansion was well-preserved and beautifully restored, so it was easy to think what it must have been like for visitors staying in the famous home.

Mount Vernon 5 I simply expected to spend some time walking around and enjoying the scenery, but I wasn’t anticipating the sense of patriotism and pride for our first President and country I felt at the end of our tour. Unfortunately, photographs were not allowed inside the mansion, but I can still remember so many of the beautiful details. You could really sense the pride George and Martha Washington felt in their home.

Mount Vernon 8

We had a mini photoshoot outside the mansion, that I will allow you to enjoy below. 🙂 It’s just such a scenic area, it was impossible to resist! 😉

Mount Vernon 11 Mount Vernon 12 Mount Vernon 13 Mount Vernon 14 Mount Vernon 15 I snagged one of the clever George Washington for President buttons to wear around the property, too!
Mount Vernon 18

Louis and I strolled over to the original vault and current tombs for the Washingtons for the last outdoor part of our visit. The original vault is pictured below, but Mr. Washington requested a larger tomb be built to house his remains along with those of his family after his death. The fact that he specifically requested to be buried at Mount Vernon should prove how much he loved his home. Mount Vernon 19

Once we walked past the tomb, we got caught in a bit of a rainstorm, so we hurried back to the museum to explore inside (where it was warm and dry!).Mount Vernon 20

We spent a couple of hours browsing the museum, and there was a lot to discover. It covered all of President Washington’s life, his time at Mount Vernon, and America’s history during his lifetime, as well as several personal artifacts of his and Martha’s. He was a pretty incredible and very interesting man.Mount Vernon 21

I happily wore my George Washington for President button the more I learned about him!Mount Vernon 22

Finally, our day came to a close, and we headed out. If you’re considering visiting Mount Vernon, I’d highly recommend it! It’s fun for all ages of people who love America. 🙂 There are also more interactive activities, areas of the grounds to explore, and facts to learn. I’m sure the outdoor activities are big during the warmer months, too! I’m thankful such a wonderful piece of American history has been preserved so well.
Mount Vernon 23

What are your favorite patriotic spots on the East coast? I’d love to know for future trips!

Retro Siggy

Continue Reading

10 Ways to Save Money in New York City

10 ways to save money in NYC

Vacations are expensive…unless you’re one of those trip planning wizards who can get 17 credit cards that magically provide you with First Class tickets across the world and free hotel stays for 2 months. If you’re one of those people, then get outta here. If you’re not, vacations are expensive. That fact is pretty inevitable. However, there are some things you can do to help bring the cost down. We lived on the East coast last summer and made countless trips into New York City. Here are some tips I picked up to keep our excursions to the Big Apple from breaking the bank!

9-11 Memorial

1. Use an app like TodayTix to get last minute tickets to Broadway shows.

We discovered TodayTix early on in our trip, and I’m so glad we did! It allows you to purchase heavily discounted tickets for Broadway (and Off-Broadway) shows up to one week prior to the show date. You can choose the showtime and price bracket you’re comfortable paying. Once you pay, you will be greeted by a TodayTix team member the day of the show outside the theater with your tickets! It sounds sketchy, I know. However, we used TodayTix multiple times and never had an issue! If there’s an in-demand show that you don’t want to miss out on, definitely buy your tickets ahead of time. However, if you have some room in your schedule, definitely consider using TodayTix! You can also enter their lotteries for various shows to get even heavier discounted tickets. You can use my referral code to save $10, too! Simply enter ITHIP during checkout.

Broadway Playbill

2. Stay outside of NYC and take the train in.

We were living in Princeton, so we took the NJ Transit into town every time. If you’re going for a short trip, it may be more cost/time effective to simply stay in the city. However, if there are other parts of the East Coast you want to explore on your trip or you aren’t short on time, consider staying outside of NYC. Chances are, the hotel will be less expensive. We’ve gone on trips to Maryland where we drove to Secaucus, NJ and took the train to Penn Station from there for only about $10. It’s definitely something to consider to keep costs down!

Rockefeller

3. Make your “souvenirs” experiences. 

How many times are you really going to wear that I<3NY shirt or admire that NYC skyline snow globe? Chances are you’ll be happier if you spend that money on tickets to a Broadway show, seeing a special exhibit at a museum, or on a box of macarons from Ladurée. Even if this doesn’t technically save you money, at least it will be money better spent.


4. If you can’t resist a souvenir, plan what you want or what you’ll spend ahead of time.

Every trip we go on, I purchase an ornament for my souvenir. I love filling our tree with our memories of our travels every Christmas, and it takes the stress out of what to buy when we’re on vacation. If you plan what you want to purchase or at least your souvenir budget ahead of time, you’ll be much less likely to go crazy at that random kiosk in Times Square.

Broadway Lion King

5. Souvenirs get cheaper the FURTHER you get from Times Square.

That yellow NYC Taxi shirt you have to have? Chances are it’s about half the cost at a souvenir shop a few blocks further away from Times Square. Times Square is a major tourist trap, so basically everything in the vicinity is overpriced. If you have the time, explore the area further from Times Square. Actually, plan to explore areas away from Times Square. They’re much more relaxing, beautiful, and empty than Times Square, guaranteed!

Central Park Foundtain

6. WALK.

Walk around! Don’t take a taxi, or a bus tour, or a pedicab. WALK! You can see much more of the city that way! Plus, New York City is so easy to get around by walking. You can stop and admire things that interest you, and you may stumble across a hidden gem on your journey. Would you rather pass by the New York Public Library quickly from a double decker bus, or walk up to it and explore the inside on your own time? If you’re in a rush or can’t handle too much walking, try an Uber. If you’ve never used Uber, use my referral code to sign up, and get your first ride free! My referral code is: alil599ue.

brownstone

7. AVOID CityPass & Tour Buses. 

CityPass MAY be a good deal, if you complete EVERY attraction included in the ticket. However, their pricing “includes” full price tickets for places that are actually “pay what you wish.” Therefore, they may not be the exceptional value that they seem. And tour buses are a waste. As I mentioned above, the city is so walkable, and riding on a bus means you can’t see things up close or stop when you want to explore an area more. Yes, many of them are “hop on and off,” but we often saw long lines of people form that were waiting for the next available bus. Why sacrifice valuable time when you could simply walk to your next destination and enjoy the city along the way?

Metropolitan Statues

8. “Pay what you wish” at certain museums. 

Most notably, the Metropolitan Museum of Art and the American Museum of Natural History, are both pay what you wish. That means, technically, that you could pay 1 cent for your ticket. While both have suggested donation ticket prices, you are not held to these prices at all! It’s as easy as walking up and saying, “Two tickets for $10, please.” Simply decide how much you feel comfortable paying for your ticket, and offer that amount. While certain exhibits have an additional fee, the majority of these museums are included with a base ticket. Many other museums in NYC offer pay what you wish or free visitation days as well. Do your research if there are any you’re hoping to visit!

Metropolitan

9. Use the subway!

Yes, I know this contradicts what I said about walking everywhere. While NYC is much more walkable than other cities, it’s also VERY big. For example, it would take roughly two hours to walk from the Met to the Brooklyn Bridge. Sometimes the subway isn’t the easiest or quickest option, but you should definitely consider it. It may seem a little intimidating at first, but there are plenty of helpful people around if you have a question. It can cut down on your travel time, plus it’s a memorable experience! Beware of altered/delayed schedules as well!

Central Park

10. Visit free attractions.

So many noteworthy spots in New York are totally free to enjoy! A few that come to mind right away are Central Park, the New York Public Library, the High Line, the Staten Island Ferry, and more! A quick Google search will offer up list upon list of free things to see and do in New York City! Peruse those and make a list of fun and free things to do on your visit! Leisurely strolling through Central Park was one of our favorite activities in the city, and it never got old.

Natural history whale

Like I said, vacations are inevitably expensive. However, hopefully these tips will help you save some cash or at least feel better about the money you do spend! Most importantly, have fun and make memories in one of the most exciting cities in the world! Feel free to browse my #TraveLANG hashtag on Instagram to see more travel tips & ideas!

New York Public Library

Any questions about specifics of one the tips I mentioned? Comment below, and I’ll do my best to help out!

Times Square

Retro Siggy

Continue Reading
1 2 3 7