Easy Minimal Nail Art

Easy Nail Art 0

I’m no artist. Let me get that out of the way up front! My handwriting isn’t great, I can’t draw worth a poot, and in general, I’m not super artistic. However, I love painting my nails (okay…that’s a lie, but I love having painted nails), and I’ve always wanted to add a fun accent to them. I’m not big on the different color accent nail trend, but I still love a fun pop of nail art, and this is the perfect compromise!

Easy Nail Art 1

All you need for this minimal nail art look is Scotch tape and two colors of polish. I used Sally Hansen Complete Salon Manicure in Naked Ambition  (previous review here) and Revlon Nail Polish in Minted. For an even more minimalist look, you could paint the nail art on your naked nail, which would only require one polish (duh.).

Easy Nail Art 2

Paint your nails whatever base color you choose. Once they are completely dry, tear off two pieces of Scotch tape. I usually stick the tape on my hand and peel it off once to pick up some dead skin cells make it slightly less sticky. It needs to be sticky enough to stick onto your nail, but not so sticky it will pull off your base polish.

Stick the tape to your nails to form a triangle shape however large or small you’d like.

Easy Nail Art 3

Use your secondary color to paint over the tape and fill in the triangle shape you created. As soon as you’re done painting, peel off the tape to reveal your perfect triangle! Make sure you peel off the tape while the polish is wet, so you don’t accidentally pull up the dry polish with the tape. You can also add a top coat afterwards, if that’s your jam.

Easy Nail Art 4

Voilà! You’re done! I think this look is so fun, and I love that you can create so many looks with different colors and without any special nail art tools.

Easy Nail Art 5

You could paint the triangles on every nail or just one finger, like I did. The tape is fun to play around with as well because you could use it to make any number of shapes or designs on your nails.

Easy Nail Art 6

If you try this nail art, share a picture of it on Instagram and tag me! I’d love to see! 🙂 Feel free to pin the image below to help you remember the simple steps in the future!Easy Nail Art 7

As always, thanks for reading!

Siggy paint

This post contains affiliate links, which means if you make a purchase using these links, I may receive a small percentage of the profit at no additional cost to you. Thank you for supporting Hoots of a Night Al!


Continue Reading

Maybelline Master Precise Skinny Gel Pencil

0

Today, I’m reviewing the Maybelline Precise Skinny Gel Pencil. As anyone who’s read my blog before knows, I’m a huge fan of Maybelline’s eye products1

This new addition to their collection is a fabulous one! It is a twist up pencil, which is my favorite kind. I love the convenience of not having to worry about sharpening it. Also, does anyone else always stab themselves in the eye with wooden shards with the pencils you have to sharpen? Just me? Great.

2

Another notable feature of the Master Precise Skinny Gel Pencil is how skinny it is. Surprise, surprise, I know. It measures only 1.8 millimeters, which allows you to get a SUPER thin line.

3

The thin line is convenient for lining your lid, tight-lining your inner lid, and lining under your eye. It’s also easy to build up for a more dramatic look.

4

The one downside to the pencil’s thinness is that it easily breaks if you wind it out too far. I made this mistake the first time I used it. However, if you keep it pretty short, you won’t have any issues!

5

This pencil glides on really easily during application, and it doesn’t smudge throughout the day.7

The gel liner claims to be waterproof, but I haven’t put that to the test. Thankfully, it comes off relatively easily when I use my Garnier Micellar Water to remove it.

89

I’m wearing the Master Precise Skinny Gel Pencil in Defining Black, which is my go to eyeliner color. It also comes in Brown and Gray.

1011

I paired this eyeliner with my current favorite Maybelline Mascara, Lash Sensational, and they work together great!

1314

As you can see below, the Maybelline Unstoppable Liner is at least twice as thick as the new Master Precise Skinny liner, which could be good or bad based on how much drama you want.  The good thing is both of them can be built up.

15161720

I’m still a huge fan of Maybelline’s eye makeup products, and I don’t expect that to change anytime soon! I definitely recommend the Maybelline Master Precise Skinny Gel Pencil if you’re in the market for a new, affordable, great eyeliner!

Siggy paint

21

This post contains affiliate links, which means if you make a purchase using these links, I may receive a small percentage of the profit at no additional cost to you. Thank you for supporting Hoots of a Night Al!

Continue Reading

Nail Polish Removal Hack!

0

Does anyone else out there paint their own nails still? I love having fresh polish on my nails, but one of my least favorite things to do is remove it! I feel like some polishes (like glitter!) can be so stubborn and hard to get off. However, a couple of years ago, I stumbled upon this “hack.” With nail polish remover and ONE cotton ball, I can remove ALL of my polish quickly and easily! Read on to see how!

2

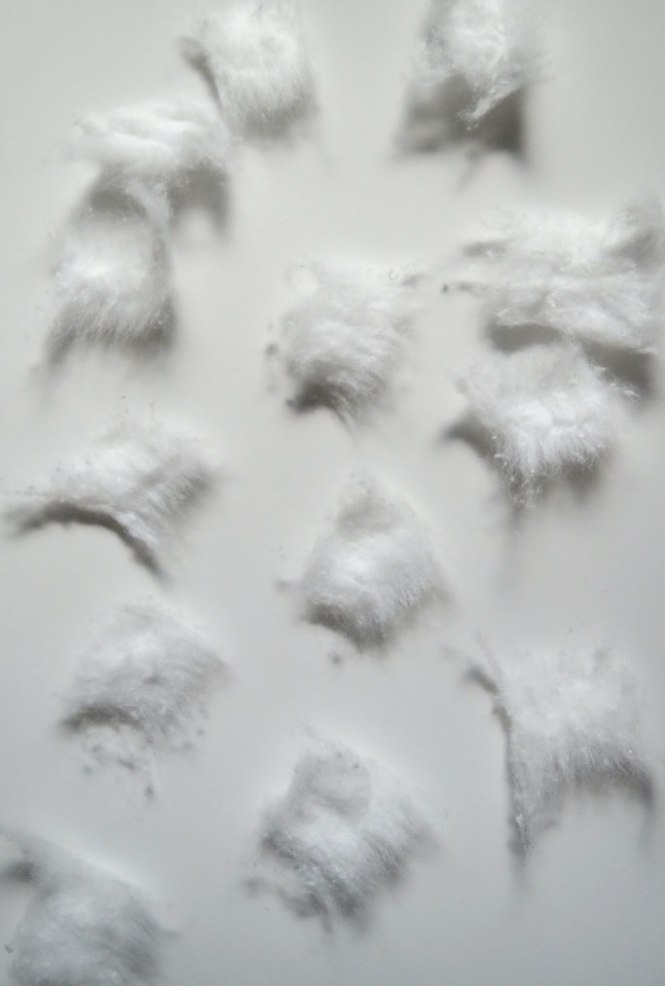
You can use acetone (which is harsher on your nails) or nail polish remover. Simply pour a small amount into the cap. Next get one cotton ball and roll it out into a strip like the picture below.

3

Gently, tear your cotton ball into ten small pieces.

4

Dip each piece into the nail polish remover, and press it onto your  nail making sure any part with polish is being touched by the polish remover. I typically do one hand at time.

5

Wait for around 15 seconds, grab the cotton ball piece, and slide it off your nail with some slight pressure. Voilà! Just like that, all of your polish is gone! 6

Like I said, I do one hand at a time, and it just takes a couple of minutes! No more scrubbing and using 15 cotton balls per hand. I hope this little tip saves you some time and cotton balls next time you’re switching polishes!

Siggy paint


1

Continue Reading

Covergirl Clump Crusher Extensions LashBlast Mascara

1

Covergirl Clump Crusher Extensions LashBlast Mascara…is that a mouthful or what? This mascara is my first foray into the world of LashBlast mascaras…shocking, I know!

2.5

This mascara claims to provide “buildable volume and length instantly.” First of all, how can the volume be both buildable and instant? Doesn’t the buildable qualifier automatically make it not instant? Regardless, it definitely needed to be built up. I applied three coats of this mascara before seeing any results, which, ironically resulted in some clumping. Shouldn’t I have been “crushing” the clumps instead of creating them?

3

The Very Black color I chose was nice and dark, but I was disappointed so many coats still resulted in such a little impact. Maybe that’s my fault because I want a false lashes look from my mascara. However, I was definitely left wanting more from this mascara.4

If you’re someone who loves a more natural makeup look, this mascara may be great for you. A few coats is basically a “my lashes, but better” look if that makes sense. The bristles on the wand are fanned and well-spaced, but VERY stiff, which made me nervous about stabbing myself in the eye (especially since I had to utilize the wand so much to try and “crush” the multiple clumps…).

6

I loved that this mascara didn’t flake throughout the day and washed off relatively easily, but those were basically the only pros for me. I know some people are diehard LashBlast fans though…do I just need to try a different version?

7

Have you tried the Covergirl Clump Crusher Extensions LashBlast Mascara? What did you think?

Talk to y’all soon!

Siggy paint

8

This post contains affiliate links, which means if you make a purchase using these links, I may receive a small percentage of the profit at no additional cost to you. Thank you for supporting Hoots of a Night Al!

Continue Reading

Maybelline Lash Sensational Luscious Mascara

1

What’s that? Another Maybelline mascara review? Well, if you insist! The Maybelline Lash Sensational Luscious mascara is a variation of the Maybelline Lash Sensational Mascara that I reviewed recently. However, they don’t have many similarities apart from their names.

2

As usual, I chose the darkest option, Blackest Black. It is definitely a deep, rich black, which I love.

3

I also love the matte black packaging. I know it will get dirty so quickly in my makeup bag, but I love how chic matte products look!

9

4.5

This mascara claims to provide a “full fan effect,” by coating your lashes with its “precious oil-infused formula.” Well, I’ll give them one thing. It does COAT your lashes. Warning: if you’re a 2 or 3 coat mascara kind of girl like me, DON’T try that with this mascara!

10

As you can see, this wand comes out with a LOT of product on it, and, regardless of how I apply it, a second coat always results in clumpy, wet lashes that I can’t separate. In these pictures I did 2 “coats,” but I never inserted the wand back into the tube between coats to grab more product. There is plenty (probably too much) from the first time you pull out the wand. It’s also super wet and takes forever to dry. I have be careful not to get any of this on my eyelids after I apply it, which is something I never usually have to worry about.

4

Thankfully, it never flakes throughout the day, which is great.

In the picture below, I switched the side of my face I’m holing the mascara on to REALLY liven it up for y’all. Yikes…think I need some new selfie makeup poses?

5

Do I love this mascara? No. Do I like it? Meh. I’ll probably keep using it, since I already have it, but it’s definitely not my first choice. If you’re wanting to try a new mascara, there are much better options out there like the original Maybelline Lash Sensational mascara or Maybelline Falsies mascara. They’re both more buildable without the issue of clumps.

7

Maybelline rarely lets me down, so I’m hoping if I keep working with this mascara, I’ll get better at applying it. Have you tried it? Any tips for helping it not clump?

8

I hope this review was helpful for you, and that you’re having a great week!

Siggy paint

Continue Reading