Easy Minimal Nail Art

Easy Nail Art 0

I’m no artist. Let me get that out of the way up front! My handwriting isn’t great, I can’t draw worth a poot, and in general, I’m not super artistic. However, I love painting my nails (okay…that’s a lie, but I love having painted nails), and I’ve always wanted to add a fun accent to them. I’m not big on the different color accent nail trend, but I still love a fun pop of nail art, and this is the perfect compromise!

Easy Nail Art 1

All you need for this minimal nail art look is Scotch tape and two colors of polish. I used Sally Hansen Complete Salon Manicure in Naked Ambition  (previous review here) and Revlon Nail Polish in Minted. For an even more minimalist look, you could paint the nail art on your naked nail, which would only require one polish (duh.).

Easy Nail Art 2

Paint your nails whatever base color you choose. Once they are completely dry, tear off two pieces of Scotch tape. I usually stick the tape on my hand and peel it off once to pick up some dead skin cells make it slightly less sticky. It needs to be sticky enough to stick onto your nail, but not so sticky it will pull off your base polish.

Stick the tape to your nails to form a triangle shape however large or small you’d like.

Easy Nail Art 3

Use your secondary color to paint over the tape and fill in the triangle shape you created. As soon as you’re done painting, peel off the tape to reveal your perfect triangle! Make sure you peel off the tape while the polish is wet, so you don’t accidentally pull up the dry polish with the tape. You can also add a top coat afterwards, if that’s your jam.

Easy Nail Art 4

Voilà! You’re done! I think this look is so fun, and I love that you can create so many looks with different colors and without any special nail art tools.

Easy Nail Art 5

You could paint the triangles on every nail or just one finger, like I did. The tape is fun to play around with as well because you could use it to make any number of shapes or designs on your nails.

Easy Nail Art 6

If you try this nail art, share a picture of it on Instagram and tag me! I’d love to see! 🙂 Feel free to pin the image below to help you remember the simple steps in the future!Easy Nail Art 7

As always, thanks for reading!

Siggy paint

This post contains affiliate links, which means if you make a purchase using these links, I may receive a small percentage of the profit at no additional cost to you. Thank you for supporting Hoots of a Night Al!


Continue Reading

Maybelline Master Precise Skinny Gel Pencil

0

Today, I’m reviewing the Maybelline Precise Skinny Gel Pencil. As anyone who’s read my blog before knows, I’m a huge fan of Maybelline’s eye products1

This new addition to their collection is a fabulous one! It is a twist up pencil, which is my favorite kind. I love the convenience of not having to worry about sharpening it. Also, does anyone else always stab themselves in the eye with wooden shards with the pencils you have to sharpen? Just me? Great.

2

Another notable feature of the Master Precise Skinny Gel Pencil is how skinny it is. Surprise, surprise, I know. It measures only 1.8 millimeters, which allows you to get a SUPER thin line.

3

The thin line is convenient for lining your lid, tight-lining your inner lid, and lining under your eye. It’s also easy to build up for a more dramatic look.

4

The one downside to the pencil’s thinness is that it easily breaks if you wind it out too far. I made this mistake the first time I used it. However, if you keep it pretty short, you won’t have any issues!

5

This pencil glides on really easily during application, and it doesn’t smudge throughout the day.7

The gel liner claims to be waterproof, but I haven’t put that to the test. Thankfully, it comes off relatively easily when I use my Garnier Micellar Water to remove it.

89

I’m wearing the Master Precise Skinny Gel Pencil in Defining Black, which is my go to eyeliner color. It also comes in Brown and Gray.

1011

I paired this eyeliner with my current favorite Maybelline Mascara, Lash Sensational, and they work together great!

1314

As you can see below, the Maybelline Unstoppable Liner is at least twice as thick as the new Master Precise Skinny liner, which could be good or bad based on how much drama you want.  The good thing is both of them can be built up.

15161720

I’m still a huge fan of Maybelline’s eye makeup products, and I don’t expect that to change anytime soon! I definitely recommend the Maybelline Master Precise Skinny Gel Pencil if you’re in the market for a new, affordable, great eyeliner!

Siggy paint

21

This post contains affiliate links, which means if you make a purchase using these links, I may receive a small percentage of the profit at no additional cost to you. Thank you for supporting Hoots of a Night Al!

Continue Reading

Nail Polish Removal Hack!

0

Does anyone else out there paint their own nails still? I love having fresh polish on my nails, but one of my least favorite things to do is remove it! I feel like some polishes (like glitter!) can be so stubborn and hard to get off. However, a couple of years ago, I stumbled upon this “hack.” With nail polish remover and ONE cotton ball, I can remove ALL of my polish quickly and easily! Read on to see how!

2

You can use acetone (which is harsher on your nails) or nail polish remover. Simply pour a small amount into the cap. Next get one cotton ball and roll it out into a strip like the picture below.

3

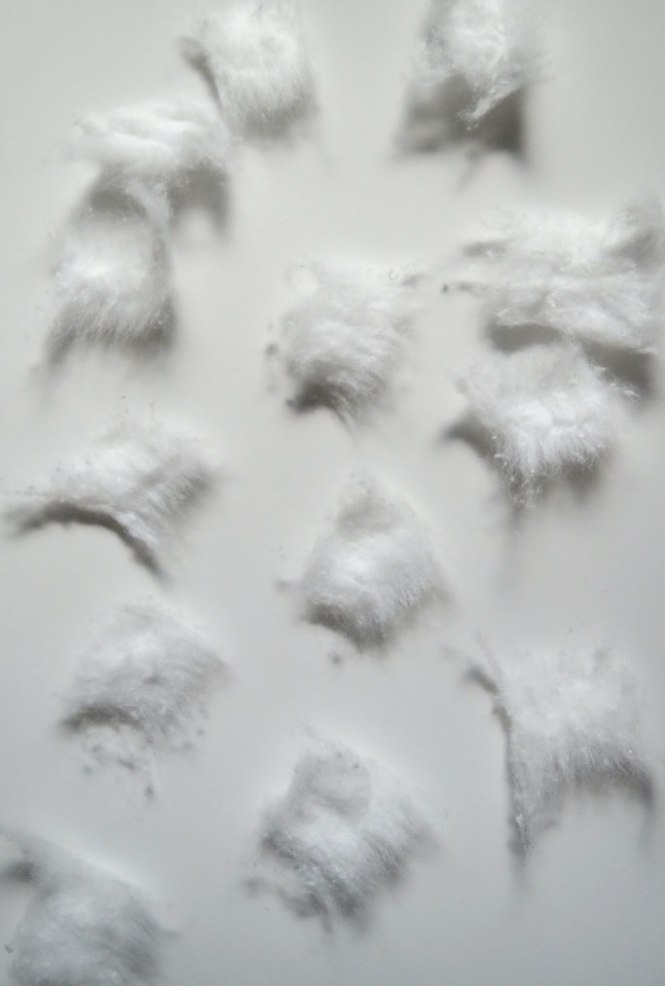
Gently, tear your cotton ball into ten small pieces.

4

Dip each piece into the nail polish remover, and press it onto your  nail making sure any part with polish is being touched by the polish remover. I typically do one hand at time.

5

Wait for around 15 seconds, grab the cotton ball piece, and slide it off your nail with some slight pressure. Voilà! Just like that, all of your polish is gone! 6

Like I said, I do one hand at a time, and it just takes a couple of minutes! No more scrubbing and using 15 cotton balls per hand. I hope this little tip saves you some time and cotton balls next time you’re switching polishes!

Siggy paint


1

Continue Reading

Blo Blow Dry Bar

0

Goofy snaps aside (I’m mrsalilang on Snapchat, by the way), this review is about my experience at the new Blo Blow Dry Bar in San Antonio. Blo’s whole mentality is “no cuts, no color,” meaning they strictly deal with washing and styling your hair.

1

I immediately loved Blo’s crisp decor, which was chic gray and white with fun pops of pink! Fresh flowers, instagram-worthy wall phrases, and bright, clean styling stations greet you when you walk in.

2

Once I checked in, I was greeted by my stylist who offered me a drink and asked what style I was looking to achieve. Blo offers 7 signature styles to choose from, but you can alter them to your liking or ask for something else completely. We talked about my hair type (mega straight and smooth) and what I wanted before she took me back to wash my hair.

5

After washing my hair, we returned to the styling station to get started. My sweet stylist (or “Bloer” as Blo refers to them), chatted with me as she combed my hair and began blowdrying.

3

During my style, she used a wide range of products, all from the Unite haircare line. She started with the 7SECONDS Detangler, aptly named because, you guessed it, it starts detangling your hair in only 7 seconds.

4

She used a round brush to completely blow dry and smooth my hair before curling it with a straightening iron after spraying each section with TEXTURIZA Spray. After all of my hair was curled, she went in with the EXPANDA Dust on my roots to tease and give me some volume. Finally, with some GO365 Hairspray, I was finished!

5.5

What do you think? Considering how naturally straight my hair is, I was amazed at what they achieved with the right products and tools! My hair had so much volume and curl, and it’s currently several hours later and still holding strong! My stylist told me some people come in once a week to have their hair washed and styled and don’t wash their hair until they return the next week! I think that’s a great testament to how well their styling techniques work, but I also think that’s sort of gross? My hair gets oily about 10 seconds after I wash it though, so I don’t think I’ll ever understand the magical mystery of people with dry hair!

6

The style closest to what I chose is “Pillow Talk,” and my stylist said this is one of their most popular styles. I can see why! I felt so glamorous all day, and I think a visit to Blo would be a relaxing treat for anyone.

7

If you’re looking for somewhere to get a fun updo, some beautiful curls for date night, or a pretty braid for Girl’s Night Out, I definitely recommend Blo! Here is the location I visited (which is having their grand opening this weekend!), but there are several across the United States.

Happy Saturday!

Siggy paint

This post contains affiliate links, which means if you make a purchase using these links, I may receive a small percentage of the profit at no additional cost to you. Thank you for supporting Hoots of a Night Al!

Continue Reading

MAC Pro Longwear Lipcreme Perpetrual Flame

0

As someone who mostly wears drugstore makeup, MAC is considered a splurge for me. When I really want to have a “treat yo’ self” moment, I know I can’t go wrong with their products…and I recently discovered, their MAC Prolongwear Lipcreme is absolutely amazing.

2

This color is Perpetual Flame, and it’s a gorgeous red with just a hint of berry to it. The color payoff is amazing, and it applies smoothly and easily.

3

I used to not care much about lipstick, but in the last few years, it has become one of my favorite beauty products, and this one is near the top of the list.

The picture below is from FOUR HOURS after I applied my lipstick AND after I ate Pappasito’s.  Anyone that knows Texans knows we don’t mess around when eating Tex Mex. I didn’t hold back, and this lipstick stayed in place perfectly.  (Also, I’m not sure what I mean by “I didn’t hold back”…I don’t eat Tex Mex like a ravenous dog…most of the time…)

5

Here I am reapplying my MAC Pro Longwear Lipcreme. JUST KIDDING. IT NEVER WEARS OFF. Seriously, I’ve worn it for at least 8 hours before, and it didn’t budge. It’s also great because even though it’s long-wearing, my lips never feel dry or uncomfortable when I’m wearing this lipstick.

6

As you can see, I’m a BIG fan of this lip product, and I think you’ll love it, too! It’s worth the tiny splurge if you’re looking for an amazing, long-wearing lipstick.

10

What are your favorite shades of lipstick from MAC? Let me know!

Siggy paint

Continue Reading